

The theme we will be working with is mediumish-theme-jekyll.
Skills Required: Some basic programming skills
Tech Stack: GitHub (project management, CI/CD, website hosting), Markdown (for writing posts), Ruby (environment management), HTML (editing structure of pages)
End Product: Hosted website where one can write blog posts, powered with Google Analytics, comments section where readers can comment on posts and a subscriber mailing list powered by MailChimp
Disclaimer: I’ll attempt to make this as simple as possible as my goal is to help people with little programming skills to build their own website.
Now, let’s get started!
1. Create a GitHub repository
First and foremost, we will be using GitHub Pages to host our website because it is FREE and allows us to automatically deploy our website with any new changes using their pages-build-deployment GitHub actions workflow (equivalent of a CI pipeline).
To do so, create a GitHub account if you don’t already have one. Then, create a repository with the following repository name: <username>.github.io. DO NOT include any other files in the repository — we will be working off the mediumish-jekyll-theme as mentioned above.
2. Initialize GitHub repository with template files
Head over to mediumish-jekyll-theme and click the “Download” button to download a .zip file of the repo. Alternatively, you can download it directly here. On your terminal, clone the repository you have just created in [1].
1
2
git clone <repo_name>
cd <repo_name>
Unzip the file you just downloaded and copy all files within the unzipped folder into the root of your repository. Some files/folders you may exclude copying are:
.githubLICENSE.txtchangelog.mdREADME.md
Once copied, let’s initialize our repository with these files.
1
2
3
git add .
git commit -m "Initial commit"
git push origin master
Once pushed, you can view the “Actions” tab on your repository to view the GitHub workflow that has been triggered. Note that this workflow automatically builds and deploys your webpage.
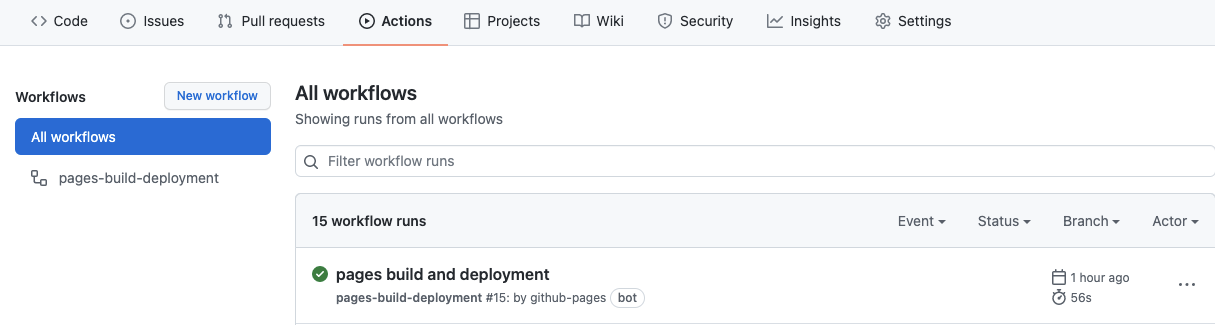
If you see a green tick after the workflow has finished running, congrats! You now have your template website up and running! You can view it at https://<username>.github.io/mediumish-theme-jekyll. You should see something similar to the live demo as seen here.
3. Customize to make it your own!
Now comes the tricky part — customization. More often than not, we want to view our changes locally before we actually deploy it (push to master branch of our repository to trigger the GitHub workflow). To test our changes locally before we deploy to let the public see it, we want to setup our local environment to serve our web page.
3a. Setup our local environment using rbenv
For purposes of this article, I’ll be using macOS to demonstrate the installation of various dependencies (please follow the instructions for your respective OS in the various links).
Since we will need to use Ruby to manage our project, we will install a ruby environment manager to manage the different versions of Ruby that are available. Specifically, we will be using rbenv for this purpose.
Uninstall any existing version of Ruby
1
brew uninstall ruby
- Install rbenv
1
brew install rbenv
- Install and use the version of Ruby we need
1
2
rbenv install 2.7.5  # Install version 2.7.5
rbenv local 2.7.5  # Use version 2.7.5
- Check that we are using version 2.7.5 of Ruby
1
2
ruby -v
>>> ruby 2.7.5
- Verify that rbenv is properly setup
1
2
3
4
5
6
curl -fsSL https://github.com/rbenv/rbenv-installer/raw/main/bin/rbenv-doctor | bash>>> Checking for `rbenv' in PATH: /usr/local/bin/rbenv
>>> Checking for rbenv shims in PATH: OK
>>> Checking `rbenv install' support: /usr/local/bin/rbenv-install (ruby-build 20211227)
>>> Counting installed Ruby versions: 1 versions
>>> Checking RubyGems settings: OK
>>> Auditing installed plugins: OK
- (Optional) Resolving PATH issues
If any of the above output is not flagged as OK, it is likely that you will need to add the relevant binaries to your PATH variable (you can check using echo $PATH).
1
2
3
4
5
6
# To add `rbenv`to PATH
echo 'export PATH="$HOME/.rbenv/bin:$PATH"' >> ~/.bashrc# To add rbenv shims to PATH
echo 'export PATH="$HOME/.rbenv/shims:$PATH"' >> ~/.bashrc
Note that the above example code assumes that one is using the bash shell. Depending on what shell you are using, you should replace ~/.bashrc with ~/.bash_profile or ~/.zshrc (for Zsh). For fish shell, use:
set -Ux fish_user_paths $HOME/.rbenv/bin $fish_user_paths
set -Ux fish_user_paths $HOME/.rbenv/shims $fish_user_paths
3b. Serve webpage locally
Before we make any changes locally, let’s try to serve the web page locally first.
1
2
bundle install  # install required dependencies
bundle exec jekyll serve --watch  # served and changes are watched
You can now find your web page served on localhost:4000/mediumish-theme-jekyll.
Congrats! You can now serve your web page locally to preview any changes you would like to make before committing this to GitHub.
3c. Editing posts
It is worthwhile noting that this theme is based on a Jekyll template built using Bootstrap 4. If you have no idea what any of these are, that’s also alright. We simply have to follow a certain format when creating and editing our blog posts. The creator of the template has kindly created a simple documentation on the YAML post format that is required.
In summary, here’s what you need to know:
- Posts will be populated by adding markdown (
.md) files in the _posts folder. - These posts .md files follow the format of
YYYY-MM-DD-insert-title-here.md. - Each post uses a YAML front matter. This simply means that each markdown file starts with:
1
2
3
4
5
6
7
---
layout: post
title: "hello world"
author: david
...
<other options below>
---
Anything below the YAML front matter is the post content itself written in markdown format. You may reference this simple markdown cheat sheet to format your post.
It is worthwhile reading the front matter options available here and understanding how to use them
3d. Editing the _config.yml
This file is perhaps the most important file that contains important configurations that you will need to edit to make the site your own. I’ll go through some of the not-so-self-explanatory ones that you need to modify.
logo.pngandfavicon.png: This is the logo used to display your brand at the top-left hand corner of the page and also below where readers can choose to subscribe to your email newsletter. Replace these files in the assets/images folder.google_analytics: This is the Universal Analytics (UA) identifier used by Google Analytics. This enables you to track important metrics like number of unique visitors, how long a user stays on certain pages, etc. Read about how to generate your own UA identifier heredisqus: This is used for the comments section that you see at the bottom of every post. To generate your own disqusID, first sign up for an account here. Next, on your profile page, select “Add Disqus To Site”. Follow the pages and select “I want to add Disqus on my site”.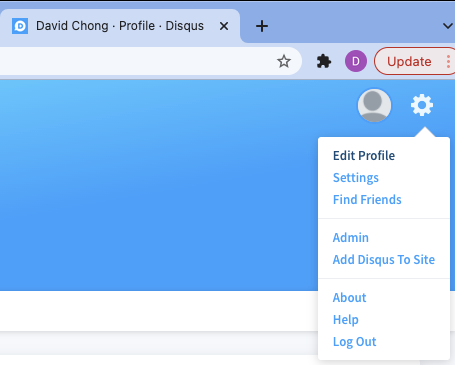
mailchimp-list: Sign up for an account with MailChimp and use their “Form builder” to customize a form and then replace with this form URL.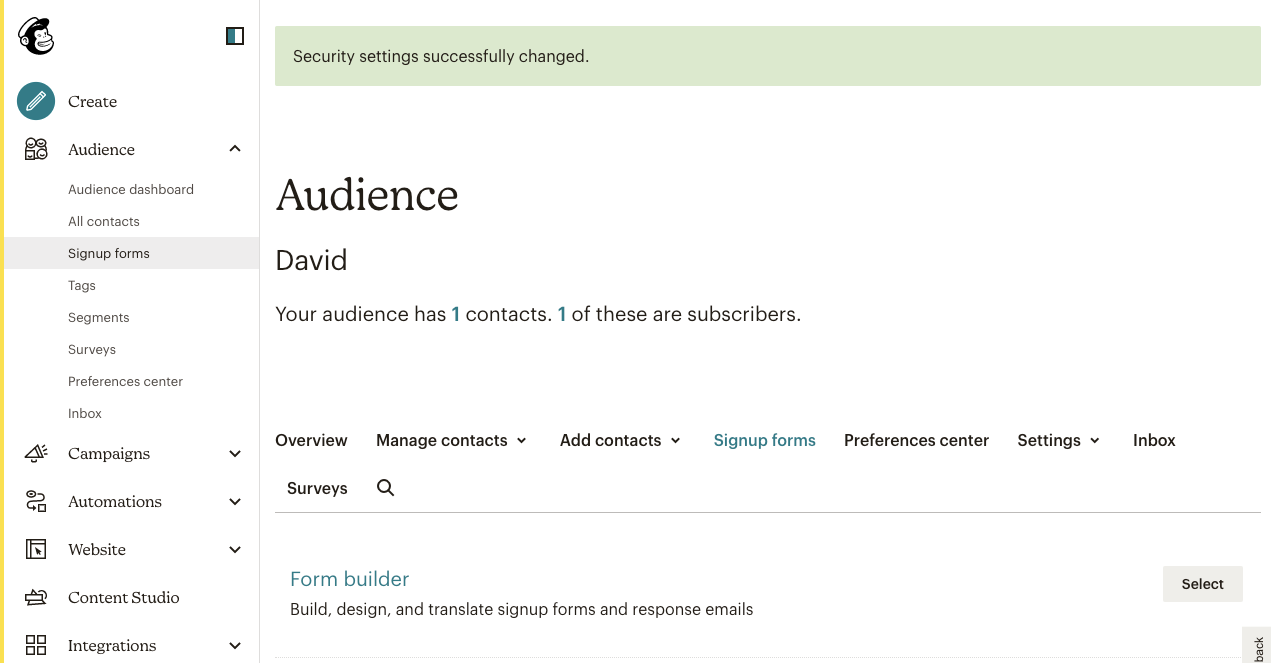
baseurl: If you do not wish to use a baseurl, simply leave it blank as such baseurl: “”. Your web page will then use theindex.htmlathttps://<username>.github.io.authors: Amend the author keys to be used within the YAML front matter
Final Words
That’s it! You’re pretty much done! Push your changes to master branch on GitHub and wait for the workflow to finish to see your changes reflected.
That said, there’s a lot more you can customize by modifying the template itself (the HTML files under _includes and _layouts). The possibilities are endless :)
Also, you can use your own custom domain instead of GitHub’s github.io if you wish. Find out how to do so here.
Finally, huge shoutout to Sal, the creator of this theme. Feel free to buy him a coffee here for his amazing work.
Closing Words
Finally, if you like what you read, do support me by buying me a 🍺 here! :) Cheers!